Sshuttle Tutorial
Quick Introduction
Sshuttle is a small application, which sets up a transparent proxy/VPN connection to a remote and private network. This can also be a private network inside an OpenStack-Project. It provides a secure and direct way to access a private network from a local client, like e.g. a laptop.
Requirements
- Linux or Mac based System. Windows is currently not supported.
- An OpenStack-Project
- One running instance, which has a Floating IP address associated to it
- SSH access to that instance
Installing sshuttle
There is support for various Linux distributions as well as Mac. The project includes installation guides for all kinds of systems.
For Debian based systems:
sudo apt-get install sshuttle
For Fedora:
sudo dnf install sshuttle
For Mac (via brew):
brew install sshuttle
Sshuttle overview
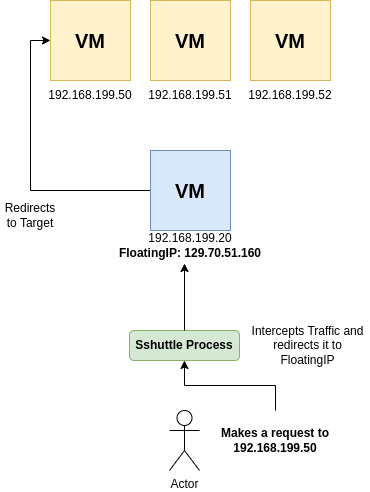
In this example, sshuttle is connected to a single instance of an OpenStack project
which holds a publicly reachable Floating IP. This instance acts as a
forwarder.
When the sshuttle tunnel is established, it intercepts all traffic designated
for the private network of the OpenStack project and sends it to the instance with a
Floating IP. Afterwards, the request is forwarded to the target instance within
the private network.
The effect is, that the local client becomes part of the private network. The process of intercepting and forwarding traffic is hidden in the background. This enables a secure way of interacting with all instances via a secure SSH tunnel. Therefore, there is no need to open additional ports in a Security Group and expose possibly insecure services to the internet.
In this example, the sshuttle-Tunnel is created on a local client (ex. Laptop):
sshuttle -r ubuntu@129.70.51.160 192.168.199.0/24
c : Connected to server.
In some scenarios you may have to extend the command to select a specific private SSH key:
sshuttle -e "ssh -i ~/.ssh/os-bibi.key" -r ubuntu@129.70.51.160 192.168.199.0/24
c : Connected to server.
Afterwards, you can open a new terminal on your local client and directly access all instances
in your private network. Don't close the session where the sshuttle process has been established.
[johndoe@myLaptop ~]$ ping 192.169.199.52
PING 192.169.199.52 (192.169.199.52) 56(84) Bytes of data.
64 Bytes from 192.169.199.52: icmp_seq=1 ttl=50 time=176 ms
64 Bytes from 192.169.199.52: icmp_seq=2 ttl=50 time=174 ms
64 Bytes from 192.169.199.52: icmp_seq=3 ttl=50 time=174 ms
The components in the command explained:
sshuttle -rindicates to connect to a remote instance.ubuntu@129.70.51.160is the remote user followed by the FloatingIP address, similar to a regular SSH-Connection.192.168.199.0/24defines the private network in your OpenStack project for whichsshuttlewill forward traffic to the instance with the Floating IP.
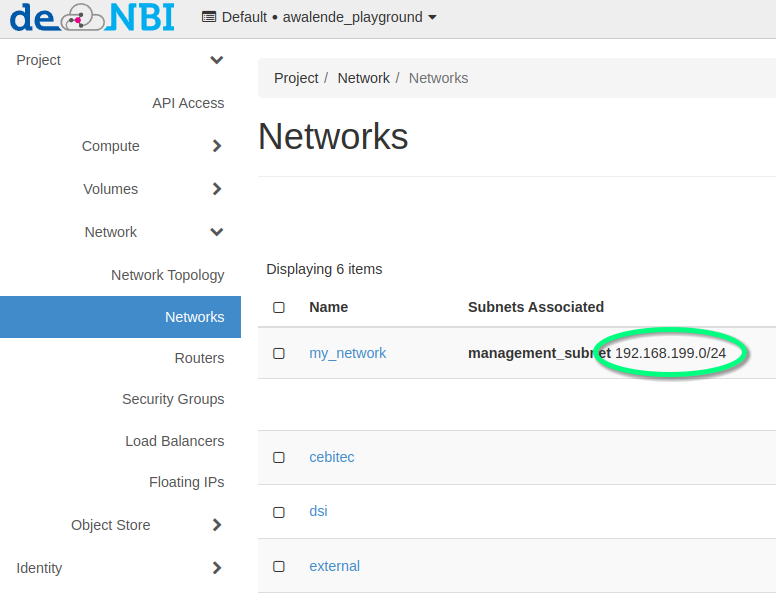
If you are struggling to find the definition of your private network, you can look it up on the OpenStack Dashboard:
In order to shut down the sshuttle process, switch back to the terminal where the session is running and press Ctrl+c.