Security
Protecting Your Digital Workspace: Why Security Matters
In today's interconnected world, workplaces rely heavily on digital technologies to store, process, and share sensitive information. However, this increased reliance also introduces significant risks to data security and integrity. Cyber threats, data breaches, and unauthorized access can compromise confidential business data, disrupt operations, and damage an organization's reputation. Effective security measures are essential to safeguard against these risks and ensure the confidentiality, availability, and integrity of digital assets in daily work environments. We want to highlight the importance of implementing robust security measures, to maintain a secure digital environment. The following is a list of some generally useful safety precautions.
Locking Your Office Door: A Simple yet Effective Security Measure

Leaving your office door unlocked may seem like a minor oversight, but it can have significant consequences for the security of your company or research institute. An unsecured workspace can give unauthorised people access to sensitive information, confidential documents and valuable equipment. This can lead to data breaches, intellectual property theft or even sabotage. Locking your office door when you leave is a simple but effective way to protect your workplace from potential threats. It prevents opportunisticc intruders from entering your workspace and ensures that only authorised personnel have access to sensitive areas. Make it a habit to lock your door every time you leave your office to contribute to the overall security of your organisation.
Locking Your Screen: Protecting Sensitive Information from Unintended Eyes
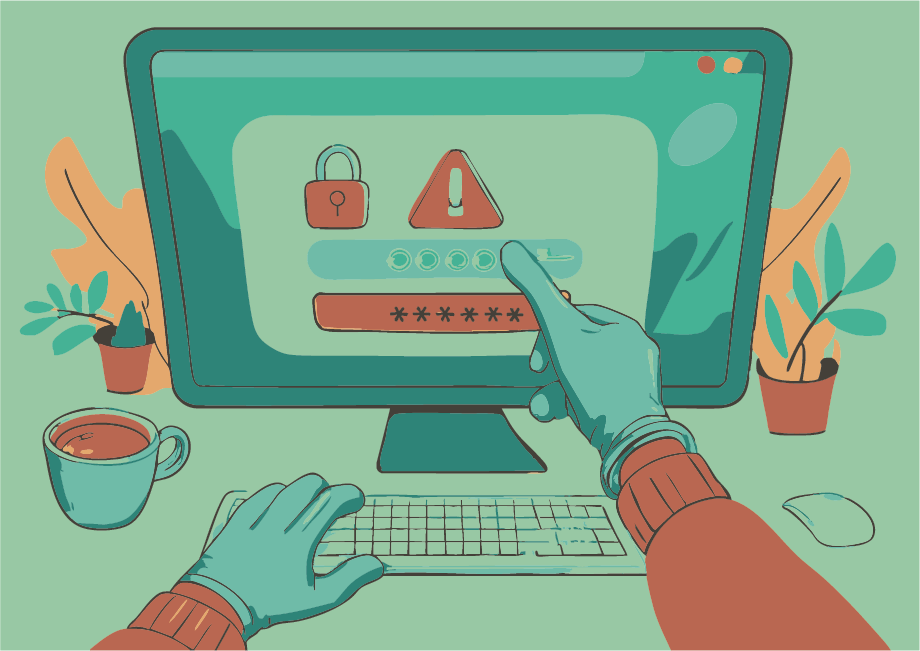
Leaving your computer unattended with an unlocked screen can be just as risky as leaving your office door open. An unsecured workstation can give unauthorised people access to sensitive information, confidential documents and restricted systems. This can lead to data breaches, intellectual property theft or even identity theft. By locking your screen when you leave your desk, you can ensure that only authorised personnel have access to the information on your computer. In addition, many organisations require regular screen locking as part of their security policy to comply with regulatory requirements and industry standards. Make it a habit to lock your screen every time you leave your workstation to protect sensitive information and contribute to the overall security of your organisation.
The Hidden Dangers of Found USB Drives

USB drives are convenient and portable, but they can also be a hidden threat to your organisation's security. Inserting an unknown or found USB drive into your computer can expose your system to malware, viruses and other types of cyber threats. These malicious devices, often referred to as "poisoned" USB drives, can compromise the security of your computer and potentially spread throughout your network. By plugging in a suspicious USB drive, you may inadvertently introduce ransomware, Trojans or spyware that can steal sensitive information, disrupt operations or even take control of your system. It is important to exercise extreme caution when dealing with unfamiliar USB drives. Never connect a found or untrusted USB device to your work computer or other company-owned equipment. Instead, hand it over to IT security personnel for proper analysis and disposal. Remember, the risk is not worth the reward - it's better to be safe than sorry!
The Risk of Unsecured Wi-Fi Networks

Public Wi-Fi networks can be convenient for staying connected on-the-go, but they often come with significant security risks. When you use an unknown or unsecured Wi-Fi network, you may be exposing your device and sensitive information to cyber threats. Hackers can easily intercept data transmitted over public Wi-Fi networks, including passwords, credit card numbers, and confidential business information. Additionally, malicious actors can set up fake hotspots that mimic legitimate networks, tricking users into connecting and compromising their devices. To protect yourself and your organization's data, avoid using unsecured Wi-Fi networks for work-related activities or accessing sensitive information. Instead, consider the following options:
- Use a virtual private network (VPN) to encrypt your internet traffic
- Connect to a secure, password-protected network
- Use your mobile device's cellular connection instead of public Wi-Fi
- Wait until you are connected to a trusted network before accessing sensitive information
The Dangers of Improper Document Disposal

Sensitive documents containing confidential information, such as employee records, financial records and proprietary business or research information, require special handling when it comes to disposal. Throwing these documents in the regular paper bin can pose a significant risk to the security and confidentiality of your organisation. Unauthorised individuals may intentionally or unintentionally rifle through the trash and access sensitive information that could be used for malicious purposes. This is often referred to as "dumpster diving". To protect your organisation's confidential information, it is essential to implement proper document disposal procedures. Consider using:
- Secure shredding bins
- Document destruction services that provide certification of destruction
When not in use, sensitive documents should be kept secure to prevent them from being accessed by unauthorized individuals.
General Measures and Awareness

As we rely more heavily on digital technologies to communicate and conduct business and research, it's essential to be aware of the potential risks and take steps to protect ourselves. Here are some general measures and best practices to help you stay safe online:
- Be cautious with emails : Be wary of phishing emails that try to trick you into revealing sensitive information or clicking on malicious links. Verify the sender's identity and check for spelling mistakes, grammatical errors, and suspicious attachments.
- Use strong passwords : Choose unique and complex passwords for each account, and avoid using easily guessable information such as your name or birthdate. Consider using a password manager to generate and store secure passwords.
- Enable second-factor authentication (2FA) : Add an extra layer of security by requiring a second form of verification, such as a code sent to your phone or a biometric scan, in addition to your password.
- Keep software up-to-date : Regularly update your operating system, browser, and other software to ensure you have the latest security patches and features.
Security aspects of cloud computing
Shift in responsibility
One important change triggered by the rise of cloud computing is a shift in responsibility. In the pre-cloud world, a system administrator was responsible for taking care of the system, installing security patches and fixes, securing the network, setting up firewalls and monitoring the operation state of servers.
With cloud computing, this has changed considerably: The system administrator is still responsible for the bare hardware servers. However, the user-created instances (virtual machines) running on these servers are the sole responsibility of the user who launched them. This includes any activity going on inside the instances while they are running as well as all of their communication with the outside world.
Large compute ressources and unrestricted high-speed internet access make cloud instances an attractive target for outside attackers. Users are obligated to keep their instances secure and up-to-date.
General cloud related security recommendations
-
SSH access: Always use key based authentication instead of a plain password.
-
Keep the operating system and all installed packages of your instances up to date.
-
Make sure to always use the most recent of the officially provided cloud images when launching a new instance.
-
Configure the internal firewall of your instances using
iptablesor some other tool to add another layer of security in addition to the security groups. -
Do not rely on any global cloud site firewall, its configuration might change without prior notice. If in doubt, ask the site administrators!
If you have detected a possible security problem with an instance, please contact the site administrators immediately and ask for support. They will to advise you on how to proceed.
Remote port access and Openstack Security Groups: Tips and best practices
- Security groups are a firewall for your project. They determine which traffic from what sources can reach your instances, and which destinations your instances can reach.
- Egress: Your instance to "internal and public destinations". Note that the default security groups allows any outgoing traffic. If you want to improve security by filtering egress traffic you need to remove the default security group from your desired instances.
- Ingress: "The internet/other sources" to your instance
- IP-Adress: Comparable to a street address. This essentially tells devices on a network where to find a host. 0.0.0.0/0 refers to any IPv4 address, ::0/0 is the equivalent in IPv6.
- Ports: Comparable to a postbox. This essentially tells devices on a network where to send traffic intended for a service. E.g. TCP port 22 is the default port for SSH. In security groups the port is always the destination port.
- Additional explanations and information can be found at https://hdacloud.h-da.io/os-user-docs/projects/sec-groups/
General firewall recommendations
In the following list the terms 'security group' and 'firewall rule' are interchangeable.
- Least Privilege Principle: Only open necessary ports required for the desired functionality. If you are unsure about which ports are needed for a specific application, consult the relevant documentation or ask the admin team for help. Opening ports based on guesswork can lead to unnecessary risks and accidental exposure of sensitive data.
- Never use all: Avoid rules that open all ports. Even if you're intending to open all ports for one instance only to a local network, this overcomplicates finding potential problems and determining the purpose of the security groups in the future. You are essentially opening Pandora's Box by opening all ports (not to mention opening all ports to 0.0.0.0/0 or ::/0).
- Use meaningful names/comments and don't combine services: This ties in to the previous principle. Use meaningful names for your security groups, and try not to use a single security group for multiple applications. If you have a security group named after your instance opening twenty-eight different ports, it becomes cumbersome to remember which port is needed for what service and turns debugging in case of errors a nightmare. The same applies to the names and comments of firewall chains on instances.
- Use specific IP ranges (if possible): If you want to make a service available in trusted networks or for certain teams only, use specific IP ranges (CIDR notation) to limit access.
E.g. limit this to your institution's IP address range.
For Bielefeld University this would be
129.70.0.0/16, which amounts to only 0.002% of the world's IPv4 addresses, thereby drastically reducing the attack surface. If you are unsure about which ranges are needed, consult the admins responsible for the network in question, ask your de.NBI admins for assistance or see the guide below. - Regularly audit your security groups: If you are making changes to your infrastructure and adding or removing services, remember to also apply the corresponding changes to your security groups (e.g., if you remove or disable a web server on one of your instances, remove the rules for ports 80 and 443).
- Prefer SSH port forwarding to opening ports: Especially if the service you want to access isn't secured with authentication and encryption mechanisms, opening the port through a security group is not a good option. Instead, you can use port forwarding. Let's say an application is exposing a web dashboard on port 8080 of your instance. By using
you can forward port 8080 from the instance (this
ssh -L 8000:localhost:8080 youruser@yourinstancelocalhostrefers tolocalhoston your instance) and make it accessible to your local machine on port 8000. By visiting http://localhost:8000 (this timelocalhostis your PC) in a browser, you can thus easily access the web dashboard without changing your security groups. Note that the SSH connection must be kept open or reopened every time you want to access the dashboard.
Further information: http://help.ubuntu.com/community/SSH/OpenSSH/PortForwarding
Security group specific recommendations
- Do not rely on single firewall layers: Do not rely carelessly on specific rules set in tools like
iptablesorufwon your instance and open everything up in your security groups. OpenStack security groups are designed for simple traffic filtering, making it more transparent and enabling you to manage or update your rules for your entire project with ease. - Don't change without checking: Don't alter the settings of a security group if you're unsure which instances the group is assigned to or what the specific rules are used for. If you have just created a new instance that slightly differs from the other instances in their function, it's probably a good idea to recreate the security group for the new instance and apply changes there.
E.g. the
defaultsecurity group (which is added to new instances by default) should never be altered. Create a new one instead, add your rules and attach it only to the instances you need outside access to.
Example and Tip: Using remote security groups in your rules
'Remote Security Group' rules in Security Groups are a useful way to manage access between VMs in Openstack. When understood, they make it much easier and safer to scale and modify within Openstack projects.
Imagine I have a proxy service that receives connections from the internet, terminates the HTTPS and passes requests on to webservers. My proxy needs to accept connections from the outside world, so it will have the standard http/https rules:
| Direction | Ether Type | IP Protocol | Port Range | Remote IP Prefix | Remote Security Group | Description |
|---|---|---|---|---|---|---|
| Ingress | IPv4 | TCP | 80 (HTTP) | 0.0.0.0/0 | - | IPv4 http from public networks |
| Ingress | IPv4 | TCP | 443 (HTTPS) | 0.0.0.0/0 | - | IPv4 https from public networks |
| Ingress | IPv6 | TCP | 80 (HTTP) | ::/0 | - | IPv6 http from public networks |
| Ingress | IPv6 | TCP | 443 (HTTPS) | ::/0 | - | IPv6 https from public networks |
These rules say, "allow (incoming) IPv4 and IPv6 connections to the proxy on ports 80 and 443, from any IP address".
So far, as normal. My security group for the proxy is called my_proxies. For my webservers I will create a security group called my_webservers. The webservers need to communicate within my Openstack project only, to and from the proxy(s). So, in the security group my_webservers I can use Remote Security Groups instead of an IP address space.
| Direction | Ether Type | IP Protocol | Port Range | Remote IP Prefix | Remote Security Group | Description |
|---|---|---|---|---|---|---|
| Ingress | IPv4 | TCP | 80 (HTTP) | - | my_proxies | IPv4 http from a proxy VM |
This rule says: "allow IPv4 traffic to port 80 from any VM that is using the security group my_proxies". This has the advantage that I can add any number of proxies to my infrastructure, or change the internal address of the proxy(s), without needing to make any changes to the security groups. It is also much easier to understand this security group quickly.
Note that rules can also use the same security group they are a part of. E.g. the default security group contains
| Direction | Ether Type | IP Protocol | Port Range | Remote IP Prefix | Remote Security Group | Description |
|---|---|---|---|---|---|---|
| Ingress | IPv4 | Any | Any | - | default | - |
| Ingress | IPv6 | Any | Any | - | default | - |
which allows any incoming traffic from VMs which also use the project's default security group.
Openstack security groups and instance firewalls
Using security groups as a firewall is relatively easy and convenient compared to most on-machine firewall solutions available (iptables/nftables, ufw, etc.)
and cannot be altered from within a VM.
But dynamic configurations (such as with fail2ban) and other advanced firewall configurations (rate-limiting, counters, packet validation, port-knocking, source port filtering, etc.) can't be realized with security groups, so combining both can be a viable option.
We recommend to restrict access with security groups to the maximum extend possible
and adding instance internal firewall tooling for redundancy and additional features.
Determine your institution's IP address range and convert it to CIDR notation
-
Use the european internet registry search to find the IP address range for your institution.
-
Search for your institution first, e.g.
Universitaet Bielefeldand find theorganisation:ID (e.g.ORG-UB29-RIPE). -
Now search again, but this time for the ID, after selecting
Inverse lookupand checking the box next toorg. -
Look for the line
inetnum:containing your institution's IP address range, e.g.inetnum: 129.70.0.0 - 129.70.255.255 -
Transform the IP address range into CIDR notation using a calculator.
-
Enter the start of the range into the field
IP Address. -
Adjust the
Mask Bits(16is a good starting point) until the end of your institution's IP range matches (or is included in) the range shown in the fieldCIDR Address Range. -
Use the
Net: CIDR Notationfrom the calculator to configure the 'Remote CIDR' of your security group rule (e.g.129.70.0.0/16).
Further information:
- https://en.wikipedia.org/wiki/Regional_Internet_registry
- https://en.wikipedia.org/wiki/Classless_Inter-Domain_Routing#CIDR_notation
Application security
Some service do not need to communicate through public interfaces: Configure them to listen on link-local and/or internal interfaces only.
Many applications support authentication (e.g. username and password). Use it to stop any outside attacks that were (easily) able to guess your instance's IP and port (which are not secret by any means).
It is also highly recommended to protect your network traffic from prying eyes using TLS which is available inside almost all server applications, especially webservers.
Feel free to take a look at the tutorial Secure hosting of a public Web Server for guidance.
Always change the default credentials of services as these are well known and will be probed as soon as the service is exposed to the internet.